2.7 KiB
This is a walkthrough to locally host the static builds for Classic and Nova user interfaces, circumventing any surveilence and censorship that can occur. This document is meant for individuals with little technical knowledge. If you want to build the source and host a development enviroment, look to the associated repositories for more details.
If you have privacy concerns about using this extension in this tutorial, you should know it is open source.
Requirements
- Desktop environment (Windows, Mac or Linux)
- Google Chrome browser
Step #1: Download the static source
For this part you'll need to be able to open .zip files, most operating systems allow this. Head to either the Nova or Classic release page on the community git to download the static files.
Nova: https://git.tornado.ws/tornadocash/nova-ui/releases
Classic: https://git.tornado.ws/tornadocash/classic-ui/releases
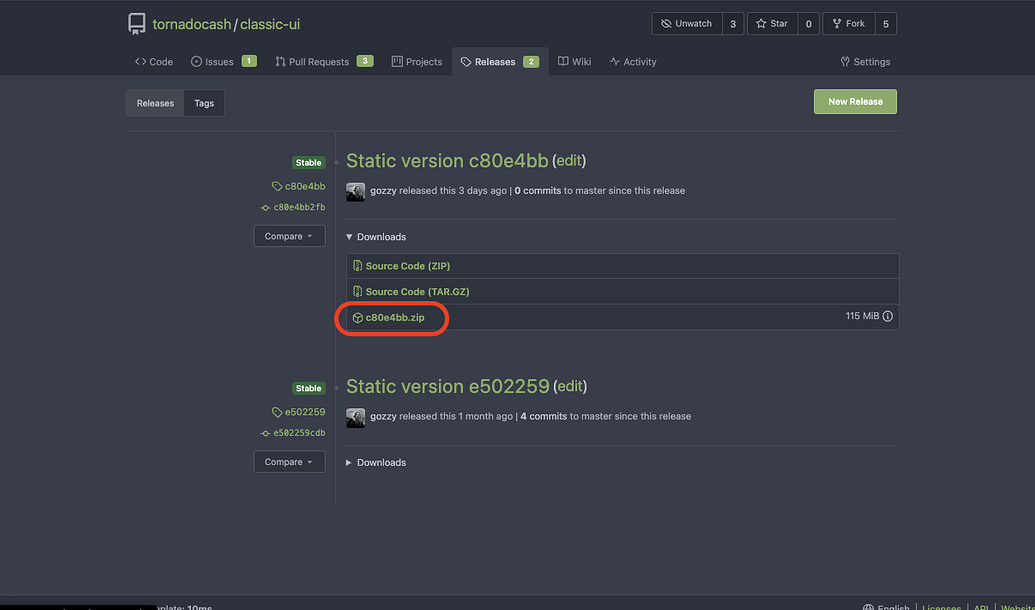
Click the version named zip file download option to download the zip file, as seen below. It should download locally to your machine.
Step #2: Open and unpack the .zip file
As mentioned before most operating systems support unpacking .zip files, so open the file that was previously downloaded in the last step. It should create a folder in the same location with the resulting files, take note of the folder location for the next step.
Step #3: Install the Web Server extension
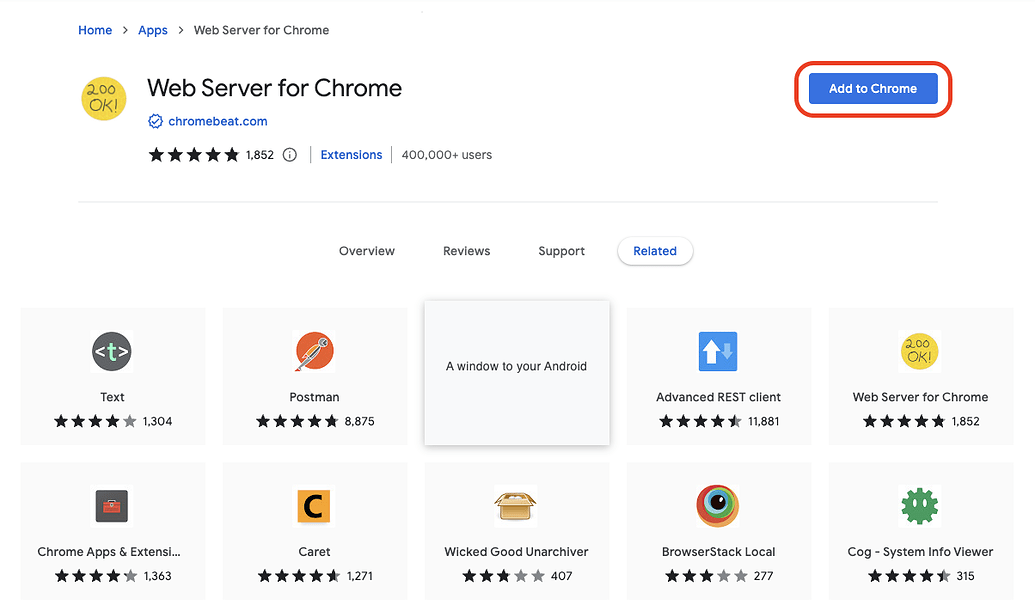
Open up Google Chrome and navigate to the Web Server extension page, click the button highlighted in the image to install. Once installed, click the same button which should now say ¨Launch app¨ to launch the extension.
Step #4: Configure the Web Server extension
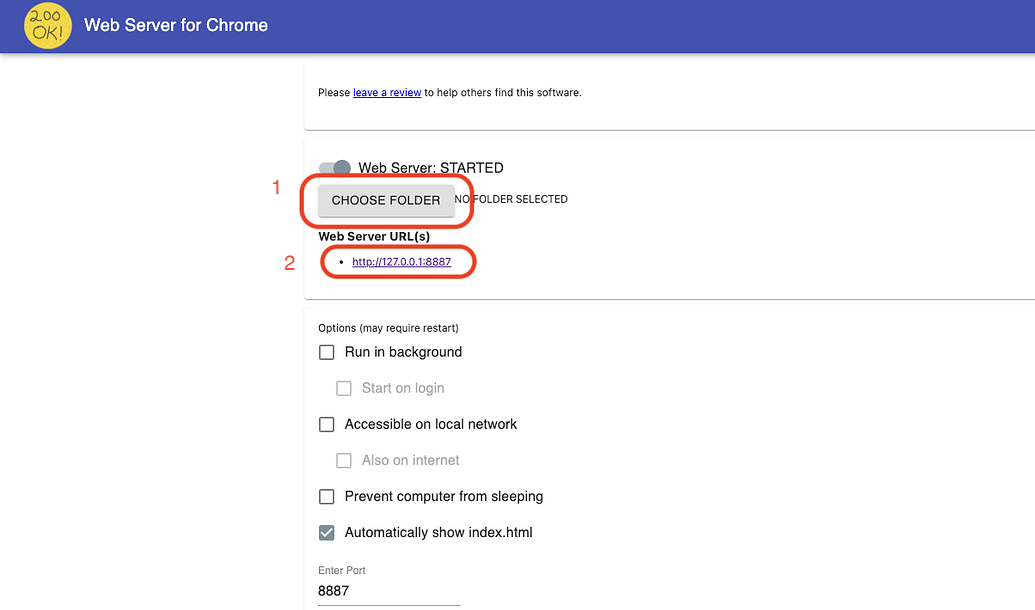
If everything is going correctly you should see a similar screen, firstly click the "Select folder" button (1) and select the folder that was created after the .zip file was opened. It should be in the same location where you downloaded it to. Then once it has been loaded click the link underneath (2) to view the hosted content.
Step #5: Achieve privacy
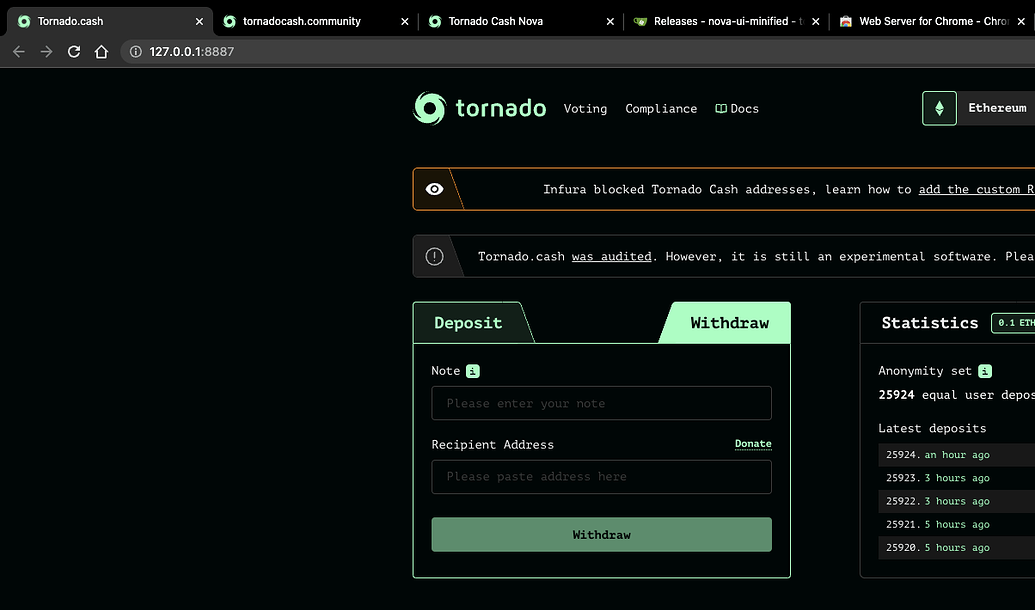
If you can see the frontend interface after clicking the link in the extension then you've successfully done everything correctly and you can use the protocol like normal.


